The New High Energy Ignition System for the Solo
210.
used with permission from Greg Anderson
|
. Installation is straightforward and only requires two special
tools. A tap (size 10-24; which is available at a Home Depot) and
a gear or flywheel puller. Southern Skies sells a puller specifically
for Solo 210 c.c. engines for $ 25.00. Most Gearpullers will work,
but be careful, The flywheel can literally go flying, hopefully
not in your face! |
 |
 |
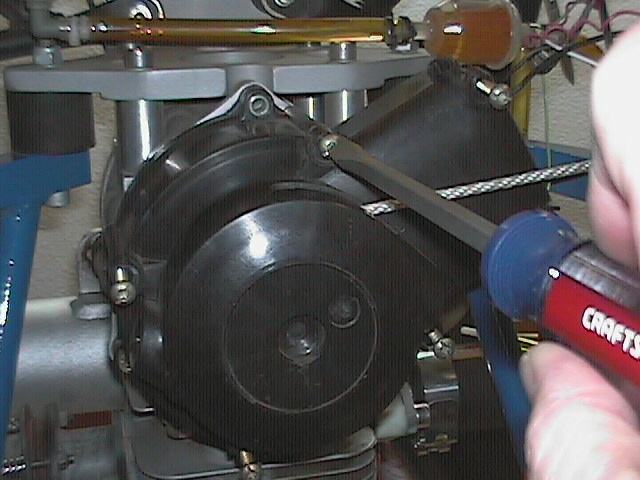
Once the starter cord/pulley system is removed, you will need to remove the entire housing unit. Use a hex wrench to remove the bolts securing the housing unit to the case.. |
|
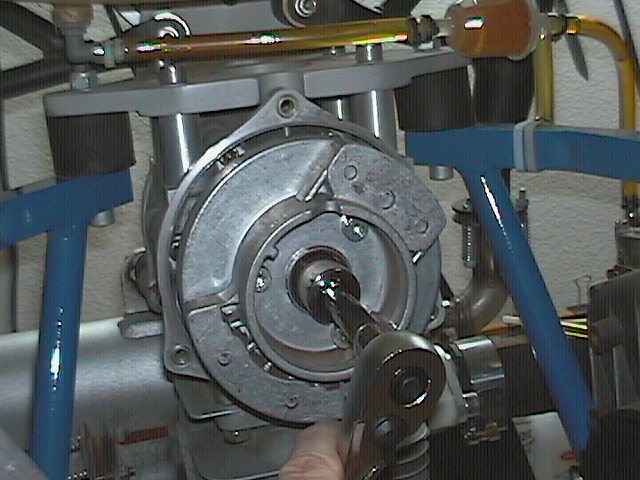
Once
the black plastic housing unit is removed, you will be able to see the stock ignition
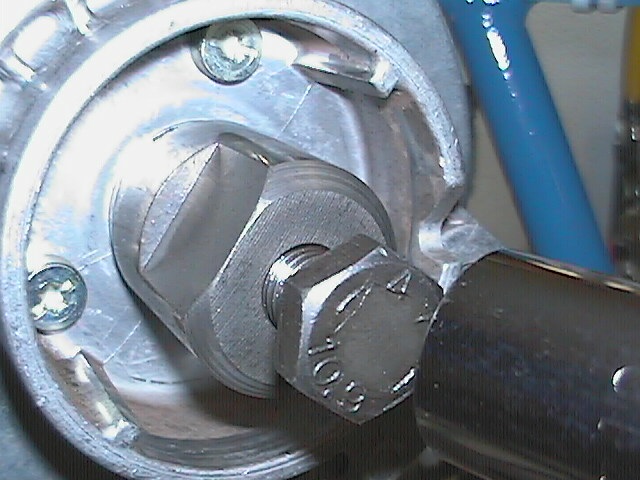
flywheel assembly. Remove the 17mm nut holding the ignition flywheel unit to the
crank spindle. Yes, you will need to hold the other side with another tool, if you do not have an Impact Wrench. A buddy is helpful at this point.
|
 |
 |
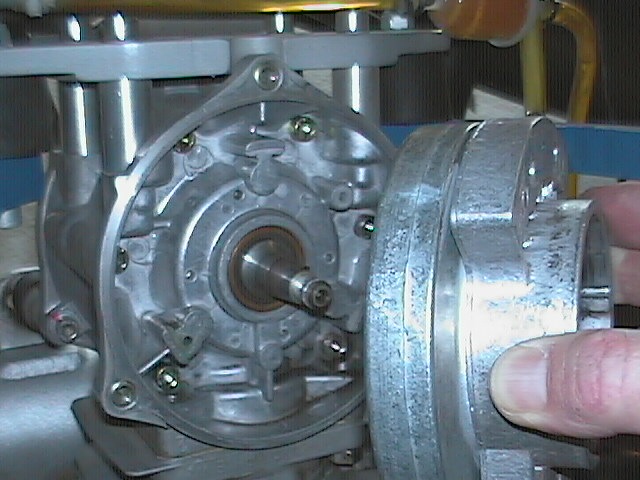
You have already removed the 17mm nut and are now ready to use the puller. Two or three turns and the original ignition flywheel will pop off the crank spindle. |
|
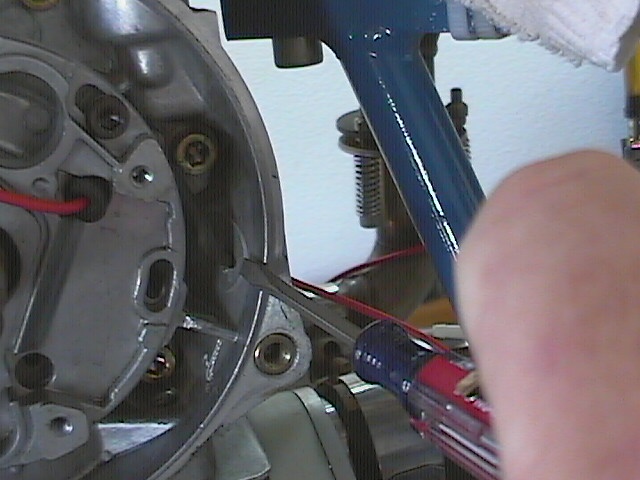
The photo on the right shows the original ignition flywheel
being removed from the crank spindle. Be extremely careful not to
lose the very small woodruf key. The woodruf key is a small, half-moon,
shaped key that fits in a small groove on the crank spindle.
|
|
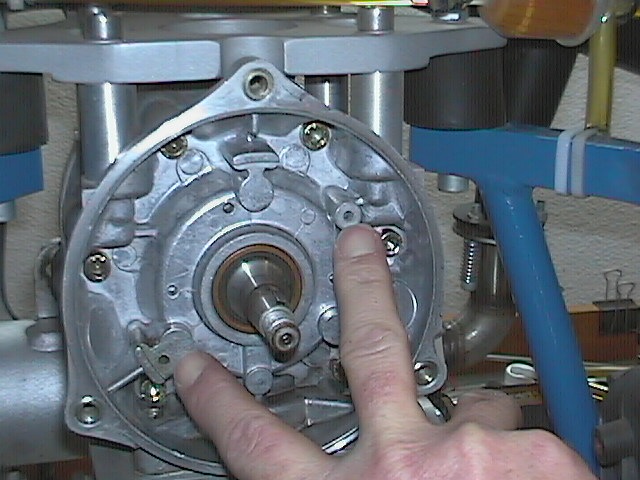 |
Now that you have removed the original ignition flywheel, you will need to drill and tap two holes. Your 10-24 tap should have come with a drill bit. My two fingers are pointing to where you need to drill and tap the two holes. Be very careful not to drill through the crankcase. Wrap tape around the drill bit to serve as a drilling depth gauge. Please wear eye protection while using your drill or Dremel. |
|
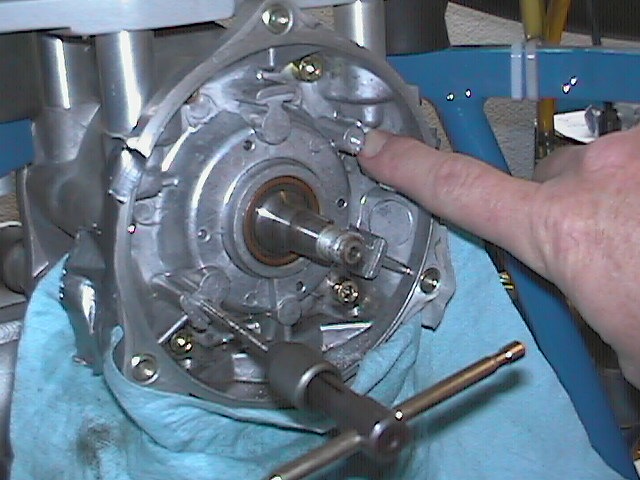
This
is the tapping process. As you can see, one hole has already been tapped. My finger
is pointing to the first tapped hole. The tap is in the second hole and the process
is ready to begin. Go slowly and turn clockwise, back out, turn clockwise, back out,
etc. Go slow and take your time. Make sure the tap is perfectly aligned with the
hole. Get your buddy to look from the side to ensure your accuracy. Be sure to reward your buddy with pizza and a Bud. |
 |
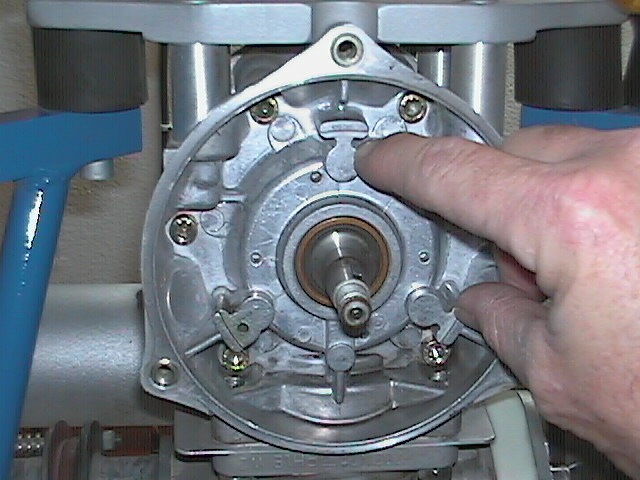 |
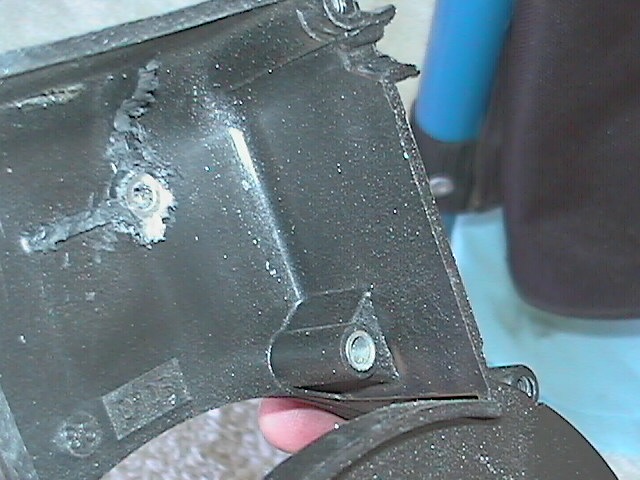
Now that you have drilled and tapped two holes, you may need to remove a little aluminum if the backing plate can't sit flat. A Dremel is a perfect tool, however, you can buy a Dremel tool bit and attach it to your drill. This will serve the same purpose. If you dont have a Dremel or drill go back to Home Depot. Or, have your buddy go for you. Take your time and be careful not to remove too much metal. You may need to remove metal from three areas. My index finger and thumb are pointing to two of those three areas. The third area is located at 7 oclock. Wear eye protection. |
|
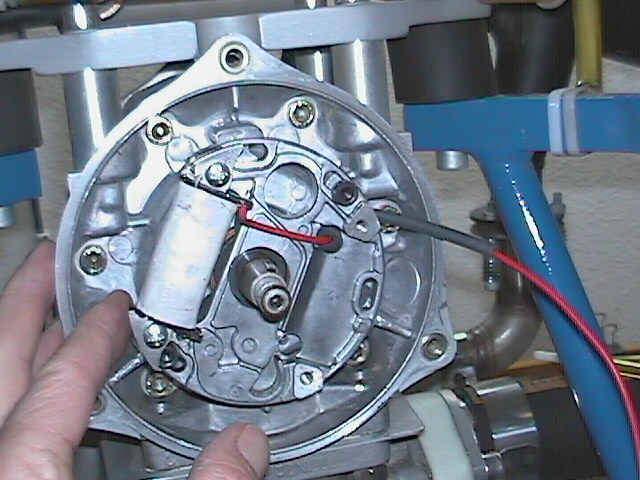
You
are doing fine. The picture on the right shows the H.E.I.S. backing place. If you
look closely you can see two black bolts that have secured the backing plate to the
crankcase. Center the backing plate around the crank spindle. Rotate all the way
counterclockwise. Then, rotate 1 2 degrees ( 1mm) clockwise (this is a very small
amount!) to set the timing. Tighten the mounting bolts. In the photo, you can also see a red wire to the right of the backing plate. Scroll down and look at the next photo. |
 |
 |
I am pointing with my trusty Craftsman screwdriver to a hole that you will have to drill to run the red wire through the crankcase. A sharp drill bit will bore a hole in 5 seconds. Guide the red wire through the hole. Put a little piece of shrink tube on the wire to protect it from fraying. Easy piece of cake. Arent you glad you bought that drill? Have you eaten all of the pizza yet? Was it cheese or pepperoni? |
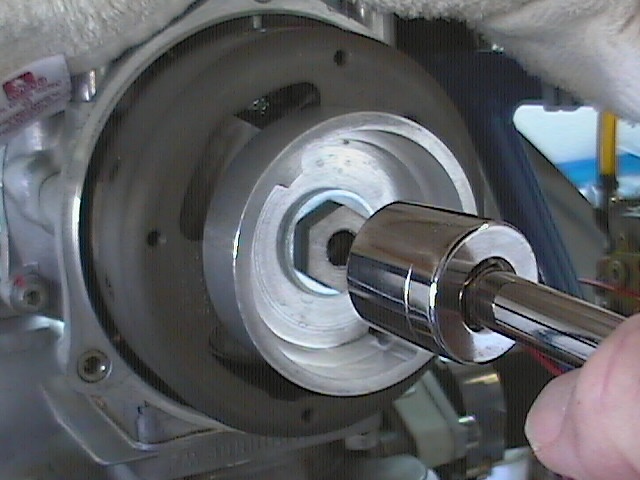
| The photo on the right shows the new ignition flywheel system installed with the new starter cup. Tighten the bolt. You are doing great youre almost done. |
 |
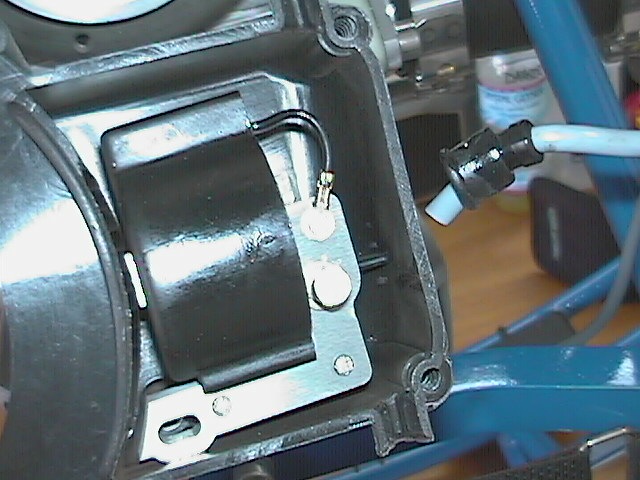 |
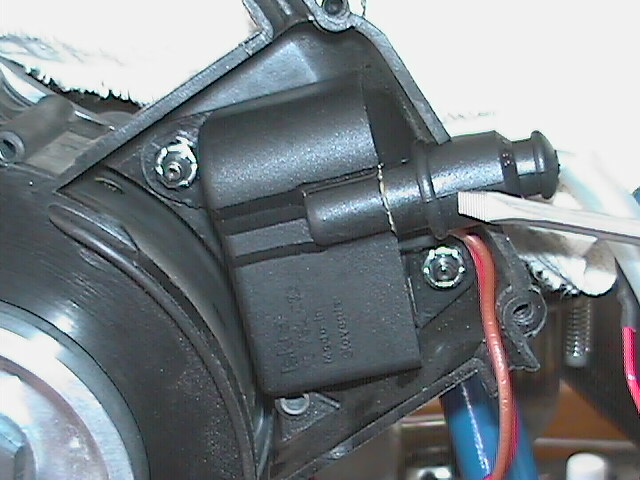
This is the stock ignition coil. You will need to remove this coil and slightly Dremel the housing unit so the new coil will fit. The spark plug wire has already been disconnected (unscrewed). It is located in the right of the photo (a light blue/gray colored wire.) |
|
Use
your Dremel to remove the plastic stud and bolt housing. Again, please wear your
eye protection. Your Dremel should have a disc
that can easily cut through the plastic and metal. The photo on the right shows the
coil housing after the excess plastic and bolt housing has been removed. Remove only
one as shown in the photo. |
 |
 |
This photo shows the new coil in place. The screwdriver is pointing to the edge of the coil housing that has been removed with your Dremel. You can also see the two screws that secure the new coil to the housing. Yes, you will have to drill two new holes through the housing for the bolts. Arent you glad you bought that new drill? Attach the spark plug wire to the new coil and run the wires to the outside of the housing unit. |
|
You
will have three wires to connect. One to engine ground (brown), and the other two
(red) to the plastic tri-connector. Your un-grounded kill switch wire is also connected
to the plastic tri-connector (red). Thats it. Reassemble the plastic housing unit and tighten all screws. Your new High Energy Ignition System is ready to use. Be careful! Your new H.E.I.S. will start very, very easy. It will only take 100 RPMs versus 500 RPMs to start. If you have a Tiny Tach you will have to get it recalibrated or exchanged for the "1-c" model because it's now getting a double spark and the "2-c" model will read twice the rpms. Your paramotor may get better fuel consumption and will be easier to start. Special Note: All Fresh Breeze paramotor units delivered after October 2000 will already be prepped for the H.E.I.S. unit. Contact Southern Skies for more information. |
 |